Job Details
This page is accessible via the jobs list on the dashboard, and also from most lifecycle steps, by clicking on the job identifier.
Contents
Job Details
This page will show you job information, including any configured custom fields. If your user account has the Jobs: Edit permission, then you will also have the ability to edit these fields from this page.
⭐ Custom fields are a premium feature. Please click here for more information.
Custom field value inputs are limited to their input type. For list custom fields, a dropdown box containing the list values will appear. If the list associated with the custom field has been deleted, the input will revert back to a text input field.
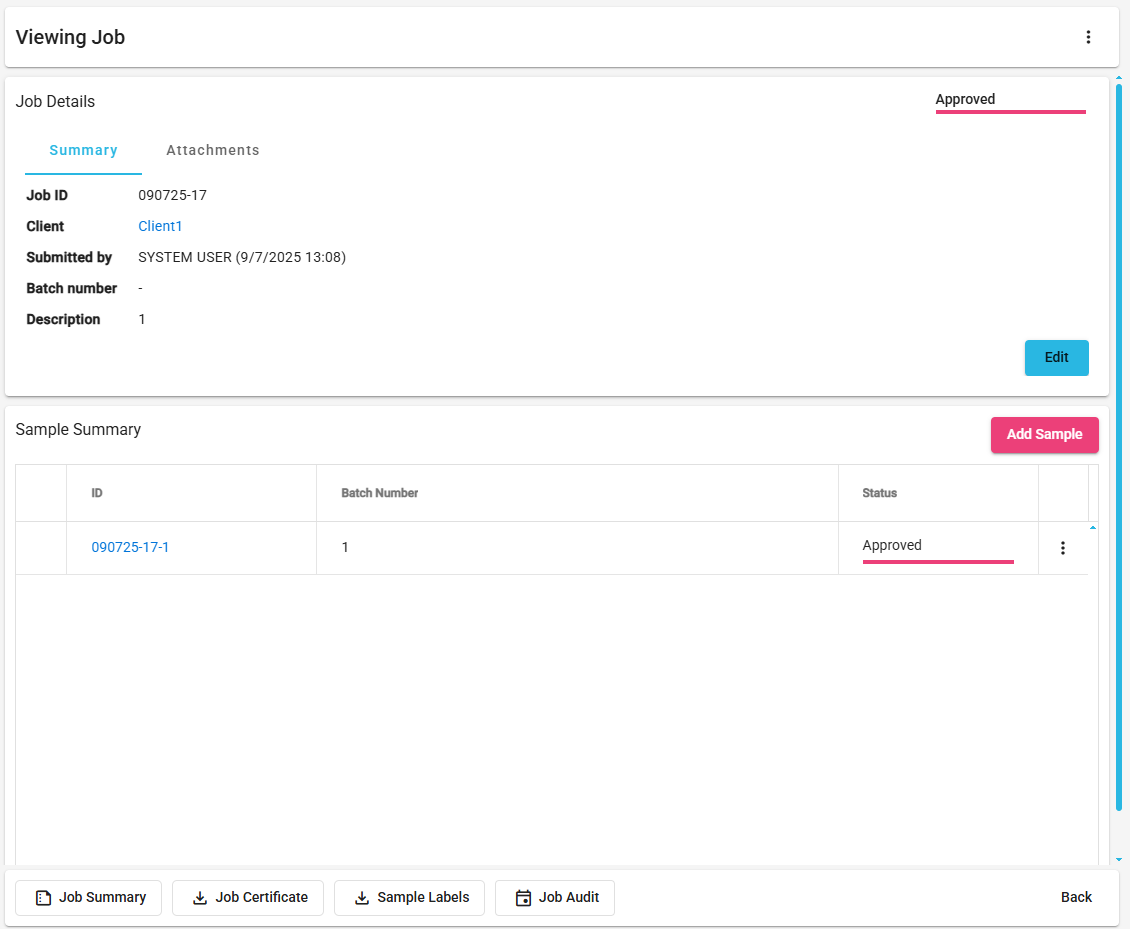
You can also delete the entire job from here by clicking on the three dot menu icon and selecting delete providing your user account has the Jobs: Delete permission.

Sample Summary
Below the main job fields is the sample summary which lists all the samples on the job.

From here you can access the View Sample screen by clicking on a Sample ID.
You can also delete samples from here by clicking on the three dot menu icon and selecting delete providing your user account has the Samples: Delete permission. Note that the last sample on the job cannot be deleted, in this case the job must be deleted (deleting all the remaining samples on the job).

Add Samples
It is possible to add additional samples to a job after it has been submitted, this can be done via View Job using the [ Add Sample ] button, as long as your user account has the Jobs: Add samples permission.
This will navigate you to a new form to fill out the essential fields for the sample. These are:
- Product
- Test suite
- Batch number (this will automatically be filled out with the job’s batch number)

Once saved you will be navigated back to View Job, and the sample will be visible in the Sample Summary. Then via View Sample you will be able to edit the tests if required. The sample will then be available for receipt.
Attachments
⭐ This is a premium feature. Please click here for more information.
From View Job, you can add attachments by selecting the Attachments tab in the Job Details panel. The Attachments tab will also show whether the job currently has any attachments by displaying a number next to the attachments label if any files have already been uploaded.
ℹ️ The job submission summary will be uploaded to the job once it has been submitted and will be available in the job attachments.
Once you’re on the Attachments tab, if you have the Jobs: Add attachments permission, you will see an input and [ Browse ] button. Selecting either of these will bring up your local computer’s file explorer which you can use to select a single file to upload.

ℹ️ File cannot exceed 30MB, and you can upload up to 10 files per job.
Once selected this file will immediately be uploaded to the server and will be shown in the grid.
This grid will show you:
- File name
- File size
- File upload time
- Menu actions
From the grid you will be able to download attachments (this doesn’t require any special permissions, just the ability to view the job). This can either be done by clicking the file name, or by using the menu for the file and pressing [ Download ].

If you have the Jobs: Delete attachments permission, you will be able to remove attachments via the file menu and pressing [ Delete ].

Availability
Essentials
Adding of attachments is not available on the LabHQ Essentials tier.
Growth & Advanced
Adding and managing attachments is fully supported on the LabHQ Growth and Advanced tiers. Users can upload attachments, subject to permissions.
Automated Uploads
This restriction does not apply to system-generated files. Attachments created through automated processes remain available across all subscription tiers, including:
- Job submission summaries
- Certificates
Users on all tiers can view and access these automatically generated attachments where applicable.
Certificates
The Certificates tab contains generated job certificates.
See Certificates for more information.
Download Job Summary
If you have the Lifecycle: Submit job permission, you will have a button in the bottom left labeled [ Job Summary ]. This button will download the Job Submission Summary report.
ℹ️ The job summary downloaded from the job view will include any changes made to the job since submission, and as such may vary from the job submission summary attached to the job on submission.

Download Sample Labels
⭐ Sample labels are a premium feature. Please click here for more information.
If you have the Sample: Download label permission, you will have a button in the bottom left labeled [ Sample Labels ]. This button will download the labels of all the samples on the job into a single file (with each label on its own page).

The document will open in a new tab as a PDF, so you can download/print the file as desired.
View Job Audit
If you have the Audit: View permission, you will have a button at the end of the bottom row of buttons labeled [ Job Audit ]. This button will take you to the list all audit records for the selected job on the Audit screen.

Regenerate Job Certificate
From the job view, if you have the permission Jobs: Regenerate job certificates , you can regenerate a job certificate by going to the menu in the top right and selecting [ Regenerate Job Certificate ].

Viewing Job Details from the Lifecycle
Within the lifecycle, job IDs are interactive and provide quick access to key information.
Accessing Job Information
Wherever a job ID is displayed, you can click on the ID to open a side panel. This presents a read-only view of the job, allowing you to quickly review important information without leaving your current screen.
This includes:
- Job status
- Job details
- Timeline
- Client details
- Number of samples
Viewing or Editing the Job
If you need more comprehensive information or want to make changes, select the View Full Job button within the side panel. This will take you to the full job view where you can explore all details and perform updates as needed.